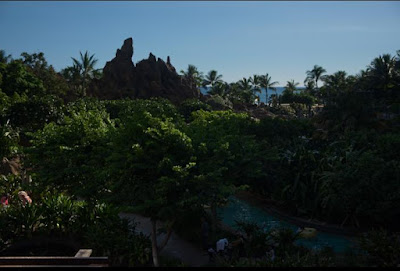
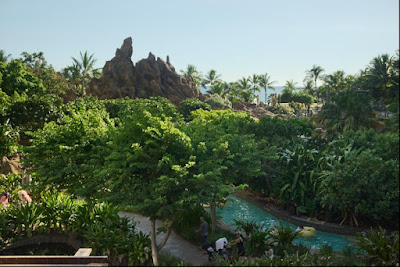
Editing High contrast images is hard because you have at the same time to decrease the highlights, increase the dark areas, and at the same time keep the natual colours. Although not always possible, shooting RAW always helps. The RawTherapee offers a plethora of tools to "fix" your images. To illustrate the tools available in RawTherapee, we will edit a picture taken by Ivan Sagalaev and released under CC license in the Play Raw competition of the pixls.us forum
here.
 |
| Image after importing to RawTherapee. |
Step 1: Preparation. First we fix the distortion (if exists) in the Transform tab. Before start editing we always try to fix possible distortions of the image.
 |
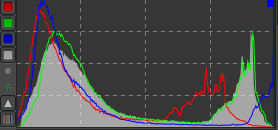
| Initial Histogram of the picture. |
Step 2: Editing the light.
The second step is to press the "Auto Levels" button in the Exposure tab. This will light the dark places of the picture, but it is not enough.The sky now is it much lighter than before and the colors washed out.
 |
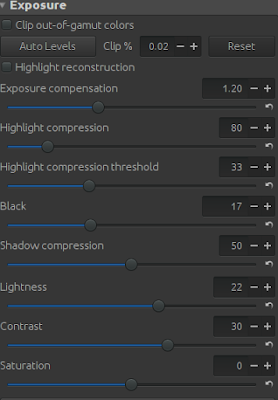
| Exposure settings in RawTherapee of the image to recover the dark areas. |
First we have to fix the highlight of the sky. We increase the exposure compensation and at the same time the Highlight compression to avoid possible over exposure.
Second, we can decrease slightly the Highlights in the Tone curve. Moreover, we can also increase slightly the Contrast in the same part of the settings.
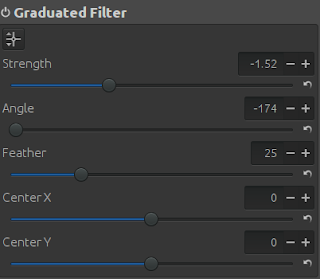
The third step is to apply negative graduated filter. By selecting negative strength we actually add more light. We set the angle to -174 to highlight only the dark areas.
 |
| Negative Graduated Filter to insert more light in the picture. |
Next we apply Tone Mapping to slightly improve the dark areas. We only need small amount (0.01) of strength to make the picture to look natural.
In the Detail tab, we enable "Impulse Noise Reduction", "Noise Reduction", and "Contrast by Detail Levels" to increase local contrast. In addition, we can enable the Defringe to improve slightly the color accuracy in the edged of the objects.
Step 4: Editing color.
 |
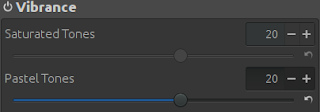
| Vibrance settings of RawTherapee. |
Finally, in the Colour tab we set the "Vibrance" to 20 to improve the liveness of the color. Additionally, we can decrease the Blue channel in the "Channel Mixer" area to decrease the impact of the blue color in the picture and make the picture more warm.
 |
| Decrease the blue channel in the settings for the color. |
As a bonus we can increase even more the contrast with the L*a*b* Adjustments and make the blues darker. Thsi is not always welcome from all the people, but I liked it anyway.
 |
| The final image after the editing. |
