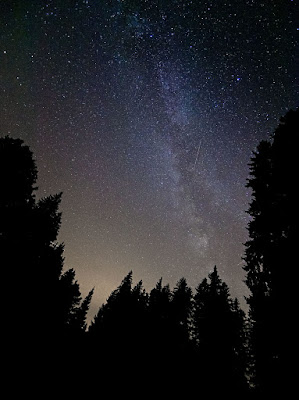
This text is an analysis of a video I did some months ago how to process photos of our Milky Way in RawTherapee. You can find the picture here. The photo was taken by wiegemalt. This work is licensed under a Creative Commons Attribution-NonCommercial-ShareAlike 4.0 International License.
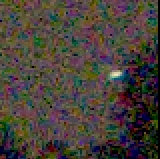
 The first thing someone notices when opening the picture is the extreme noise due to high ISO used (1600 - check the picture on the right). The first thought is to de-noise the picture, however, if you do that you are going to loose the details of the night sky. The main reason for the high noise is the additional exposure Rawtherapee adds when the 'Auto' button is pressed. In particular, the RT adds +2.4 EV to equalize the picture.
This is Wrong! What we want is to keep the noise down and at the same time bring the stars up. That's why we are going to play with the Tone Curve of the RT.
To adjust the light properly we increase the contrast by creating a nice "S" shape in the tone curve. We have to decrease the shadows and the darks, but at the same time to increase the lights and the highlights. The slight increase of the lights is optional if you want to emphasize the 'cloud' of the Milky Way.
After the adjustment, you will get a histogram similar to following. Most of the shadows are now totally dark and we created a more uniform area in the center allow further editing. Someone can push the settings even more but remember not to overshoot it.
We observer graduated additional yellow light that increases towards to the trees. This happens due to light pollution created by nearby lighting. To address this type of lighting we can use the graduated filter of the RT. You have to press the button to show the widget to adjust the position and the feather of the filter. Rotate the filter and adjust it to achieve as much more uniform sky. You can see the difference if you transform the picture in black and white and compare them:
After the gradual filter, you can adjust even more the curves and the strength of the gradual filter. The settings will be different depending on the light pollution and to the actual lightness of the picture.
Impulse noise reduction can be also be enabled using the default settings. I will really suggest reducing the value to something like 26. Note not to overshoot it because you can remove stars from the picture.
Next to remove the yellowish of the left bottom area we are going to use the HSV Equalizer. You can modify each color range differently. We reduced significantly the yellow part:
Editing:
Step 1: Fixing lighting
 The first thing someone notices when opening the picture is the extreme noise due to high ISO used (1600 - check the picture on the right). The first thought is to de-noise the picture, however, if you do that you are going to loose the details of the night sky. The main reason for the high noise is the additional exposure Rawtherapee adds when the 'Auto' button is pressed. In particular, the RT adds +2.4 EV to equalize the picture.
To adjust the light properly we increase the contrast by creating a nice "S" shape in the tone curve. We have to decrease the shadows and the darks, but at the same time to increase the lights and the highlights. The slight increase of the lights is optional if you want to emphasize the 'cloud' of the Milky Way.
After the adjustment, you will get a histogram similar to following. Most of the shadows are now totally dark and we created a more uniform area in the center allow further editing. Someone can push the settings even more but remember not to overshoot it.
Step 2: Fixing the light pollution using the graduated filter
We observer graduated additional yellow light that increases towards to the trees. This happens due to light pollution created by nearby lighting. To address this type of lighting we can use the graduated filter of the RT. You have to press the button to show the widget to adjust the position and the feather of the filter. Rotate the filter and adjust it to achieve as much more uniform sky. You can see the difference if you transform the picture in black and white and compare them:
After the gradual filter, you can adjust even more the curves and the strength of the gradual filter. The settings will be different depending on the light pollution and to the actual lightness of the picture.
Step 3: Fixing the Noise
The next step is to adjust the noise of the picture. Adjusting the lightness of the picture helped a lot to reduce the noise, but you can't completely remove it due to high ISO used. The first step is to adjust the mode to Aggressive (or High quality in older versions of RT). Then we use Curve as luminance control to allow better adjustment. We want to de-noise the dark areas, but not the areas that contain light. We adjust the curve by increasing it in the dark part and decreasing towards to the right side. In addition, we have to manually adjust the color noise reduction. We have to decrease the value because default settings of RT are really aggressive. You can also increase slightly the detail recover slider.Impulse noise reduction can be also be enabled using the default settings. I will really suggest reducing the value to something like 26. Note not to overshoot it because you can remove stars from the picture.
Step 4: Increase local contrast
Next, we increase the local contrast by using the 'Contrast by Detail Levels'. A small push can really make the picture more clear, but you also increase the noise, so use it with caution.
Step 5: Fixing the color
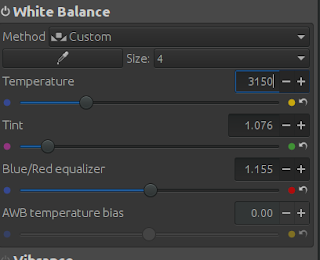
Someone will easily say the yellow light is part of the light pollution. However, this is not always true. In this picture, we can decrease the temperature of the white balance in the color tab. We decrease the Temperature to something like 3150K make it less warm.Next to remove the yellowish of the left bottom area we are going to use the HSV Equalizer. You can modify each color range differently. We reduced significantly the yellow part:
Step 6: Bonus: Fix the lens geometry
Although not included in the initial video, you can fix the distortions created by the lenses in the Transform tab. There are two settings you have to play with: Distortion correction and Vignetting. For the distortion, you can simply press the 'Automatic' that most cases works well. Vignetting correction requires more experimentation. You can increase the amount and the strength initially to see the impact in the picture. After the initial editing, you can adjust the amount to something normal.
Final result:


