Earlier this year i did some videos (
here and
here) regarding how to remove the noise from high ISO raw images. I decided to write down the work flow with text and pictures to avoid the seeking the video in different parts.
The original file is available here: https://discuss.pixls.us/t/playraw-high-iso-challenge/2778 and the image is taken by PkmXDec using a Sony A6000 + Canon FD 85mm f/1.8 S.S.C. + Lens Turbo II wide open.
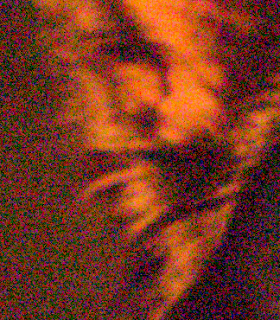
Out of the box, the picture shows a lot of noise and the color is too warm if we press the "Auto Levels". This happens because he ISO is 12800 and the lighting available: sodium light. In addition, the color noise has a specific noise pattern, as shown in the uniform part of the picture on the left.
 |
| Initial RAW image conversion using the default options. |
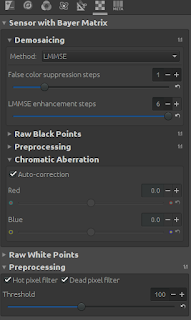
1. Our first approach is to change the Demosaicing method from the "RAW" tab. The "RAW" tab contains all the options responsible from converting the image from the RAW format to actual picture. This is the first step of process flow before applying any advanced filter or changing the color temperature. In this tab, we change the AMaZE to LMMSE method. We also change the enhancement steps to 6. The image now has slightly better color noise. An alternative method to use in high noise pictures is the IGV.
 |
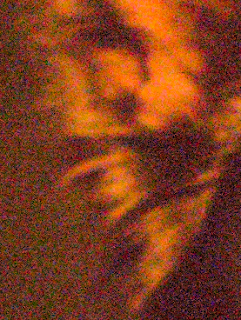
RAW image after using the LMMSE method.
Notice the reduction of color noise. |
Moreover, Chromatic Aberration in the same tab (Demosaicing) can fix possible chromatics aberrations in the picture. We select "Auto-Correction". Finally, we can also enable the "Hot pixel filter" and the "Dead pixel filter" under the "Preprocessing" set of options.
 |
Demosaicing method options of
the RawTherapee when processing
high ISO images. |
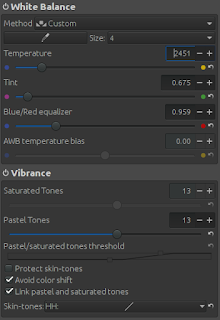
2. Next we have to fix the white balance from the color tab. We decrease the temperature to 2451 and we enable the vibrance with a small value (13) to improve the unsaturated colors. We may improve the color in the final phase of our editing.
 |
| White balance of the RawTherapee. |
3. The next important step is the noise reduction from the Detail tab. There are two noise reduction methods: The normal and the impulse. We initially enable the "Impulse Noise Reduction" with the default settings. We expect to see a small improvement in random white and black pixels appearing.
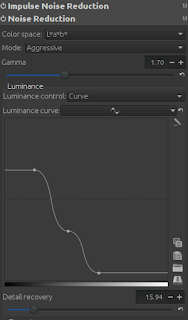
Next we enable the "Noise Reduction". We change the Mode from "Conservative" to "Aggressive". We will notice the difference in color noise, but we have to modify the luminance reduction to achieve better results. We change the "Luminance control" to "Curve". Now we can decide how much noise reduction we want depending on the light available. As generic rule, the dark parts of the
picture contain more noise, so we have to increase the noise reduction. We also increase the "Detail recovery" to improve the details of the picture and decrease the impact of noise reduction.
 |
Noise reduction options of
RawTherapee for high ISO
RAW images. |
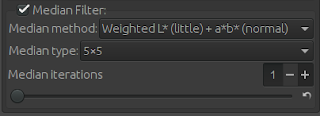
Now even with enough noise reduction, we still have some artifacts. To remove them, we can apply the "Median Filter" from the same tab. Due to high noise of this picture, we select "5x5" Median type and "Weighted" Median method to eliminate also the remaining color artifacts.
 |
Median Filter options for the noise reduction of the
RawTherapee for High ISO RAW images. |
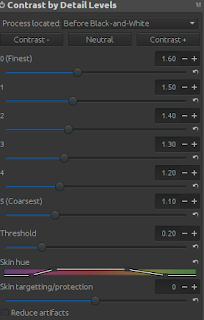
4. With noise reduction, we also loosing vital information of the image and we decrease the overall clarity of the picture. To fix this we enable the "Contrast by Detail Levels" from the same tab. We have to add a bit only to avoid the artifact generation in the picture.
 |
Contrast by Detail Levels of
the RawTherapee. |
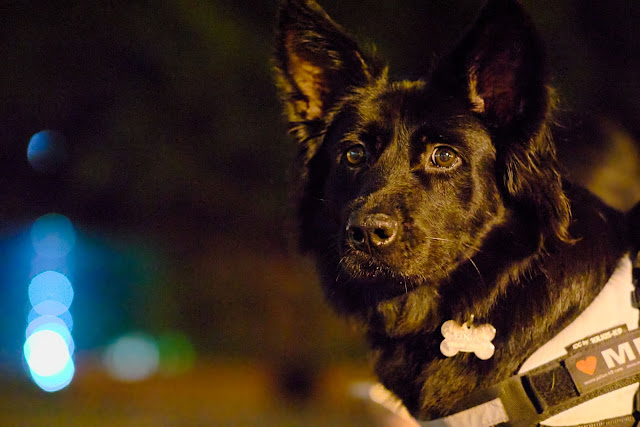
5. Finally, we adjust the light and the contrast of the picture. The produced histogram show that the image needs more contrast. In this particular photo we decrease the shadows, we decrease the Exposure compensation to 1.2 and increase the "Black" value to 980 to emphasize the black in the picture.
 |
| Final image after processing with RawTherapee. |
