A couple of years ago I tried to receive the NOAA 18 using a small in-door antenna and an RTL DVB-T USB receiver. The results were disappointing. However, I always had in the back of my mind that I will try again in the future with an external antenna. The era of cheap RTL-SDR hardware has come, so many people have started looking for receiving images from the weather satellites. Easy targets are the NOAA satellites that transmit weather images using Automatic Picture Transmission method (APT). These satellites provide images in different wavelengths of light.
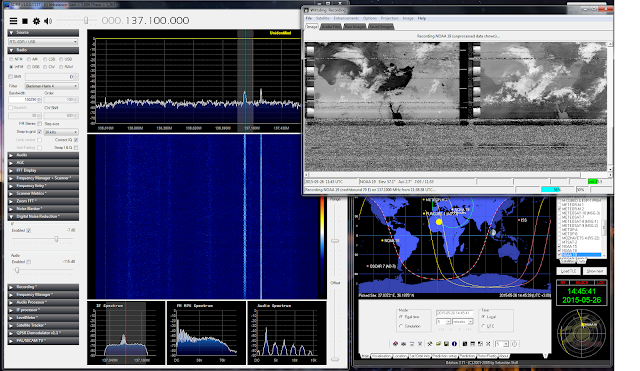
So after following instructions from a site dedicated to the RTL-SDR receivers, I tried to receive some pictures using the simple TV antenna. However, this decision had many disadvantages, as the TV antennas are designed to receive signal on higher frequencies from NOAA satellites. Despite the poor reception and low cost (e.g.,. none, I had an old tv antenna installed, but not used) I was able to receive some pictures. I used the SDR# with the RTL-SDR plugin for receiving the signal (sound), orbitron for tracking the satellite, and WXtoImg for converting the images. Here is a screenshot of my setup:
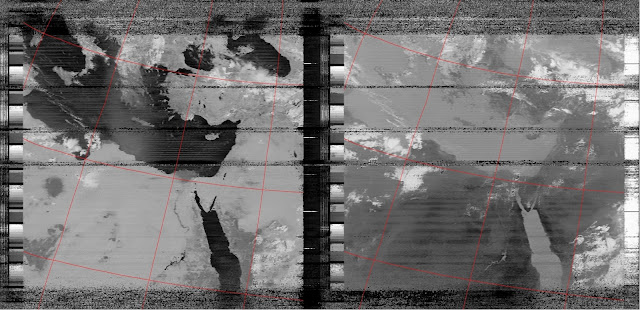
After the first reception, the WXtoImg converts the APT signal to images. Here are two examples of the pictures received:
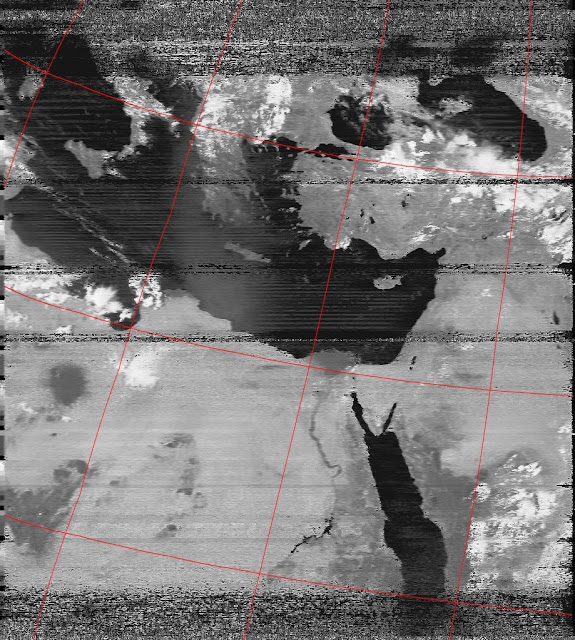
After the first reception, WXtoImg makes some processing on the pictures to improve the contrast. Here is the output of raw images:
After that, WXtoImg can also create a color version of the picture:
Next target is to buy a proper antenna and a proper receiver, such as the
SDR play or the FUNcube Dongle plus.
So after following instructions from a site dedicated to the RTL-SDR receivers, I tried to receive some pictures using the simple TV antenna. However, this decision had many disadvantages, as the TV antennas are designed to receive signal on higher frequencies from NOAA satellites. Despite the poor reception and low cost (e.g.,. none, I had an old tv antenna installed, but not used) I was able to receive some pictures. I used the SDR# with the RTL-SDR plugin for receiving the signal (sound), orbitron for tracking the satellite, and WXtoImg for converting the images. Here is a screenshot of my setup:
 |
| Software setup for receiving NOAA 19. Left the SDR# tuned at 137.1 MHz using the RTL Dongle, right top the WXtoImg to decode the image and right bottom orbitron for tracking the satellite. |
After the first reception, the WXtoImg converts the APT signal to images. Here are two examples of the pictures received:
 |
| Raw reception 26 of May 2015 of NOAA 19. Note the big cloud approaching from the left. On the right is the infrared version of the picture. |
 |
| Raw reception 24 (?) of May 2015 of NOAA 19. |
 |
| Improved contrast of NOAA 19. Received using RTL dongle, SDR# and WXtoImg. |
 |
| Improved contrast of NOAA 19. |
 |
| Color view of the received image from the NOAA 19 using SDR# and WXtoImg. |
Recent advancements in the RTL dongles packaging made affordable wide band receivers such as the SDR Blog Receiver with Rtl2832u ADC Chip